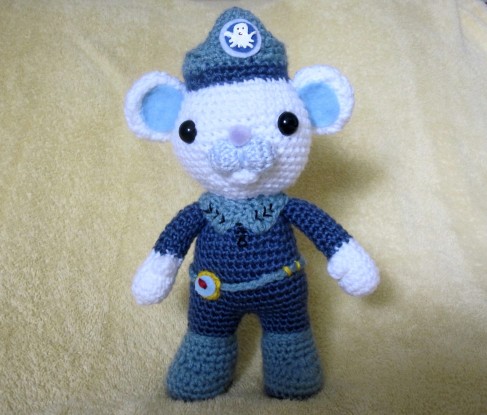
Octonaut – Captain Barnacles
Posted on: May 25, 2012
- In: Crochet
- 31 Comments
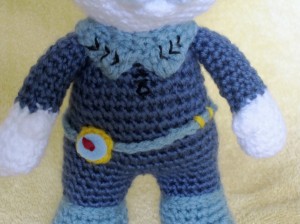
Octonaut – Captain Barnacles
Octonauts is a trademarked design by Meomi Designs partnered with Disney Junior. I do not own and am not affiliated with either of these. This pattern will be offered free of charge so as not to conflict with any rights of design.
Supplies Needed
Worsted Weight Yarn In – White 15mm Craft Safety Eyes In – Black
– Light Blue Felt (tiny amounts) In – White
– Medium Blue – 3 Shades of Blue
– Dark Blue Puffy Fabric Paint In – White
Sport Weight Yarn In – Gold Embroidery Thread In – Black
¼” Craft Pom Pom In – Light Purple – Red
Clear Fabric Glue Polyester Fiber Fill
Yarn Needle Embroidery (sharper) Needle
* Special Note Before Beginning *
Take your time! One of the great things about crocheting any kind of critter, is how detailed we can make them. Unfortunately, too often these details are lacking and, while the final product may “resemble” the intended character, it is usually not as accurate as it could be. My advice is to pay attention to the details so that your final product looks very polished. After all, you’ve already spent quite a bit of your time making it so you might as well spent a little longer on your finishing to make it perfect!
Head
(Worked in continuous rounds throughout pattern unless stated otherwise)
*Use White Yarn*
Row 1: 6sc in magic ring, pull tight (6)
Row 2: 2sc in each st (12)
Row 3: (sc, inc) to end (18)
Row 4: sc, inc, 2sc, inc, 3sc, inc, 2sc, inc, 3sc, inc, 2sc (23)
Row 5: 2sc, inc, 3sc, inc, 4sc, inc, 3sc, inc, 4sc, inc, 2sc (28)
Row 6: sc, inc, 4sc, inc, 5sc, inc, 4sc, inc, 5sc, inc, 4sc (33)
Row 7: 3sc, inc, (7sc, inc) 3 times, 5sc (37)
Row 8: 7sc, inc, (8sc, inc) 3 times, 2 sc (41)
Row 9: 15sc, inc, 20sc, inc, 4sc (43)
Row 10: 10sc, inc, 14sc, inc, 13sc, inc, 3sc (46)
Row 11: 25sc, inc, 20sc (47)
Row 12: 10sc, inc, 36sc (48)
Row 13: sc even (48)
Row 14: 36sc, dec (always use an “invisible” decrease), 10sc (47)
Row 15: 20sc, dec, 25sc (46)
Row 16: 3sc, dec, 13sc, dec, 14sc, dec, 10sc (43)
Row 17: 4sc, dec, 20sc, dec, 15sc (41)
Row 18: 2sc, dec, (8sc, dec) 3 times, 7sc (37)
Row 19: 5sc, dec, (7sc, dec) 3 times, 3sc (33)
Row 20: 4sc, dec, (5sc, dec, 4sc, dec) 2 times, 1sc (28)
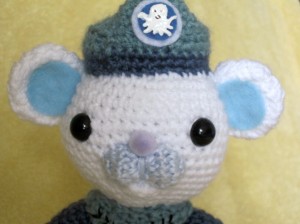
*This is the point where I stopped and put in my safety eyes. Use the picture and your judgment for placing. I also start stuffing here so that it can be firmly packed by the end*
Row 21: sc2, dec, (4sc, dec, 3sc, dec) 2 times, 2sc (23)
Row 22: (2sc, dec, 3sc, dec) 2 times, 2sc, dec, 1sc (18)
Row 23: (dec, 1sc) to end (12)
Row 24: *incomplete round* (dec) 4 times, fasten off leaving a long tail.
*Weave the tail through the 4 stitches of the last row and the 4 stitches of the previous row, stuff tightly enough that the head is a taut, perfect sphere but not so tight as to show the stuffing through the fabric, and pull tight to close the opening. Set head aside for now.*
Mustache
*Use Light Blue Yarn*
Row 1: sc7 in magic ring, pull tight (7)
Row 2: (inc) to end (14)
Row 3: sc even (14)
Row 4: (dec over 3 stitches, dec over 4 stitches) 2 times (4)
*This part can be a bit fiddly, but be patient. It’s worth it for an accurate representation*
Row 5: 3sc in next st, (4sc in next st) 2 times, 3 sc in next st (14)
Row 6: sc even (14)
*Stuff first section*
Row 7: (dec) to end (7), cut and leave a long tail for finishing. Weave through the last 7 sts, stuff the second section and pull closed tightly.
*Weave the tail through the place between the two sections. Wrap the tail around the middle 2 times and tug to add definition to the mustache. Then weave the tail just enough to keep the wrapped yarn snug but still leave the tail for sewing. Sew the mustache to the face, again using the picture and your judgment for placement.*
*Glue the purple pom pom to the top center of the mustache for the nose*
Bottom Lip
*Use White Yarn*
Row 1: 4sc in magic ring, tighten (4)
Row 2: sl st, (inc) 2 times, sl st, finish off leaving a long tail.
*Attach to head just below the mustache (no stuffing) with the sl st ‘s touching the head and the sc ‘s facing out. Weave in ends.*
Hat
*Use Medium Blue Yarn*
Row 1: 6sc in magic ring (6)
Row 2: (inc) to end (12)
Row 3: 6sc, (inc) 6 times (18)
Row 4: sc even (18)
Row 5: 6sc, (inc) to end (30)
Row 6-7: sc even (30)
Row 8: 6sc, (sc through the BLO) to end (30)
Row 9: inc, 5sc, inc, 11sc, inc, 11sc (33) sl st in first st to join
*Switch To Dark Blue Yarn*
Row 10: Ch 1 (Counts as first stitch), (sc) to end (33), sl st in first st to join
Row 11: Sc even (33), sl st in first st to join
Row 12: Ch 1 (Counts as first stitch), inc in same st, 6sc, inc, 12sc, inc, (sc) to end (36) join with a sl st, finish off leaving a long tail for sewing.
*Attach and sew to the center top of the head, stuffing as you go, using the picture and your judgment for placement. Trace a quarter on white felt and cut around for the decal on the hat. Trace a penny on dark blue felt. Using your fabric glue, glue the dark blue felt onto the center of the white felt and then the white felt onto the center front of the hat.
Ears (Make 4)
*Use White Yarn*
Row 1: 6sc in magic ring (6)
Row 2: (inc) to end (12)
Row 3: 9hdc, 3 sl st (12)
Row 4: *incomplete round* (hdc inc) 4 times, sl st. Finish off leaving a long tail for sewing.
*When all 4 are complete, sew two pieces together with right sides facing out (Sewing 2 pieces together gives the ear a sturdier design and allows them to take a slightly cup shaped form to look like a bear’s ear). Attach and sew to head (no stuffing) just below the hat using the picture and your judgment. Cut two half circles of light blue felt and glue to center of ears.*
Body
*Use Dark Blue Yarn*
Row 1: Ch 24 and join in a circle (24)
Row 2: sc even (24)
Row 3: (7sc, inc) to end (27)
Row 4: sc even (27)
Row 5: (8sc, inc) to end (30)
Row 6: sc even (30)
Row 7: (9sc, inc) to end (33)
Row 8: sc even (33)
Row 9: (10sc, inc) to end (36)
Row 10-19: sc even (36)
*Flatten piece and separate the body in half, use stitch marker to pin the middle (18 sts for each leg)*
Legs And Boots
Row 1: 18sc *skip the other 18 sts for the second leg* sl st to join the round (18)
Row 2-5: Working only on these 18 sts, sc even (18)
*Switch to medium blue*
Row 6: Sl st even (18)
Row 7: Working in the FLO of Row 5 (last row of dark blue) sc even (18)
Row 8-9: sc even (18)
Row 10: 14sc, (hdc inc) 2 times, 2sc (20)
Row 11: 14sc, (hdc inc) 4 times, 2sc (24)
Row 12-13: sc even (24) *At the end of row 13, sl st to join to first st and finish off, leaving a tail for weaving*
*Using the remaining 18 sts, attach the dark blue yarn at the center front and repeat rows 1-9*
Row 10: 2sc, (hdc inc) 2 times, 14sc (20)
Row 11: 2sc, (hdc inc) 4 times, 14sc (24)
Row 12-13: sc even (24) *At the end of row 13, sl st to join to first st and finish off, leaving a tail for weaving*
Boot Soles (Make 2)
*Use Dark Blue Yarn*
Row 1: CH 6
Row 2: Insert hook into 2nd back loop from hook, 3sc, 3 sc in last st, 3sc down the other side, 3 sc in last st, sl st to join oval (12)
Row 3: CH1 (counts as 1st sc), 4sc, 5sc in next st, 5sc, (3sc in next st) 2 times, sl st to join (21)
Row 4: CH1 (counts as 1st sc), 6sc, (3sc in next st) 2 times, 8sc, (2sc in next st, 1sc) 2 times (27)
*At the end of row 4, sl st to join to 1st st and finish off leaving a long tail for sewing*
Arms (Make 2)
*Use White Yarn*
Row 1: 6sc in magic ring, pull tightly to close
Row 2: (inc) 6 times (12)
Row 3-4: sc even (12)
Row 5: 10sc, dec (11)
Row 6: 3sc, dec, 3sc, dec, bobble st (9)
Row 7: sc even (9)
*Change to Dark Blue Yarn*
Row 8-15: sc even (9)
Row 16: 7sc, dec (8)
Row 17: sc even (8)
Row 18: 6sc, dec (7)
Row 19: sc even (7) *join to 1st st with a slip st and finish off leaving a long tail for sewing*
Collar
*Use Medium Blue Yarn*
Row 1: Chain 25
Row 2: Insert hook into 2nd st, 7sc, hdc, 2tc in next st, dc, 2sl st, dc, 2tc in next st, hdc, 8sc, finish off leaving a long tail for sewing.
Compass
*Use Gold Sport or Worsted Weight*
Row 1: 6sc in magic ring, pull tight (6)
Row 2: (inc) to end (12), finish off leaving a long tail for sewing.
Assembly
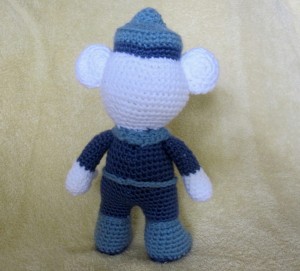
Using the picture and your judgment for placement, start sewing your Octonaut together. I’ve already given the instructions for the head assembly because I always get the head together as quick as I can (then I am much more excited to see it finished!) After that, I usually wait until the end for everything else. This is the order I used.
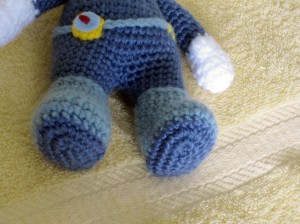
Sew the soles onto the bottoms of the boots. Also sew up the small hole between the legs.
Then stuff the legs firmly using the neck opening and continue stuffing the rest of the body leaving a little room without stuffing at the neck. Start sewing the body to the head. For every 2 or 3 seam stitches, pull tight for a very smooth join. Finish stuffing as you go.
Next, stuff paws and arms firmly towards the bottom but a little less firmly towards the opening (otherwise the arms will stick straight out to the side rather than angled downward) and sew to body just under the head.
Sew collar just under the head. It will be a snug fit to close it and I did that on purpose so that the neck would have extra re-enforcement. Use your sewing to shape the bottom of the collar into two sharp triangular points.
*Finishing Details*
Sew a Chain of 36 sts around the body as a belt. I used the back loops of the chain to sew it to the body. This gave the belt a smooth 3 dimensional shape. I made sure to sew the belt on at an angle to match the television character’s.
Sew the compass on top of the belt towards the side of the body also matching the character’s (be careful to maintain the circular shape while sewing).
Cut a small circle of medium blue felt to fit just inside the round shape of the compass. Using the red embroidery thread and the embroidery needle (sharper point) sew a little arrow. Glue this piece to the compass.
Use a tiny amount of the gold yarn and sew 2 little belt loops on the other side of the body.
Use the black embroidery thread to stitch arrows onto the collar and to stitch a zipper at the center of the chest.
Use the white puffy paint to put the Octonaut Octopus symbol on the hat. Once, dry, I just used a ball point pen to draw he eyes and mouth onto the Octopus symbol. Definitely let the ink dry before touching otherwise it WILL smear.
Please say hello to your new Captain Barnacles! I hope you enjoy your new Octonaut!
Design by OoKnittyLou
Packing
Posted on: March 23, 2012
Jack And LuLu
Posted on: March 22, 2012
Visit With Ashley And Dewy
Posted on: March 22, 2012
Arch’s Bday Party
Posted on: March 18, 2012
Go Fly A Kite
Posted on: March 18, 2012
“Just Because” Cupcakes
Posted on: January 31, 2012
Pink Champagne Cupcakes!
Posted on: January 3, 2012
I am going to visit some friends tonight and since they are cooking dinner, I decided to bring dessert! I couldn’t decide on which recipe so my friend, Jenny mentioned my favorite cupcakes in the WORLD! How could I refuse?? So… Pink Champagne Cupcakes were the plan for today 🙂
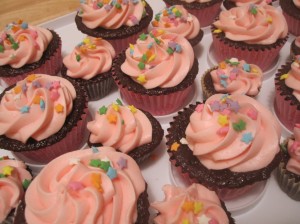
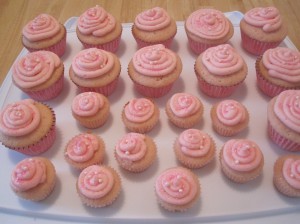
Anything with THIS much pink is a winner in my book.
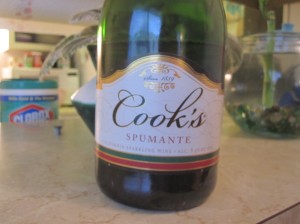
I tried a different champagne this time and I think it really made a difference. The flavor is much more prominent. It’s still a Spumante but the taste is better. (I got to shoot off my first champagne cork today!)
I ended up making two dozen regular sized cupcakes and then an additional dozen of minis for Jack’s daycare.
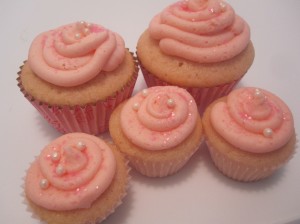
I decorated with a champagne flavored buttercream frosting and edible glitter with edible pink pearls. If there was any other way to make them even more girly, I would. But I don’t think its humanly possible LOL.
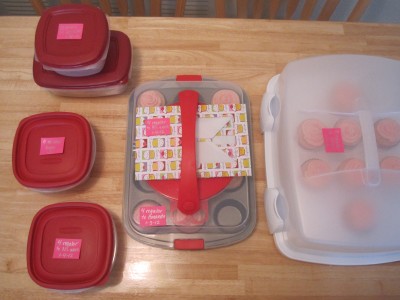
Before I had even tasted one, I had already packaged them up to be distributed. 12 minis to daycare, 4 regulars to Nick’s shop, 4 regulars to my office, 4 regulars for my sister and mom, 8 to Miss Angie and Kayleigh’s house tonight, and 4 to stay home. 3 dozen and I’m keeping 4. Oh well. All the better on a healthy diet 🙂
So I’m thinking that only 11 minis are going to make it to daycare LOL. I’m dying to taste one.
**EDIT** Yup. They are freaking fantastic!!
